Happy Hump Day, beauties! For this very special post, I had to channel my inner Jess from LoveforLacquer.com. She’s one of my good friends, and by far one of the best beauty bloggers out there. If you couldn’t tell by the name of her blog, she specializes in nail polishes and her swatches are literally perfect. Before embarking on the very large task that was swatching all twelve nail polishes from the Disney Villains Nail Set by e.l.f. Cosmetics, I asked her for some tips and I realized that she is completely brilliant. She only photographs three fingers because if you’ve ever tried to prettily hold a nail polish bottle with all four fingers, you’ll know that it can be extremely awkward. If you haven’t, just take my word for it. So thank you Jess, for all of your help and your inspiration for this post, and allowing me to borrow your fantastic swatching style.
Now that the dedication is done, let’s move on to the matter at hand. I received this awesome, 12 piece nail set as part of my Disney Villains haul, which you can watch HERE. I have never tried e.l.f.’s nail polish, but I was a little wary because 12 polishes for $10 seems too good to be true. However, just like the e.l.f. Maleficent lookbook, which I used for a villainous smoky eye tutorial, I was pleasantly surprised!
Unlike the rest of the Disney Villain collection, this nail set includes polishes inspired by all four of the wicked women–Maleficent, the Evil Queen, Ursula, and Cruella de Vil. There are three polishes for each villainous lady, which makes for a nice array of colors in this collection. They range from creme polishes to glitter crellies, with some neons and metallics in between. While they’re not the best polishes I’ve ever used, they really performed pretty well. In general, they were only just slightly streaky, but not at all gloopy, and most of them were opaque in just two coats. They dried quickly, but don’t have a completely shiny finish, which doesn’t really matter to me because I never go without a top coat. Okay, this has been the world’s longest intro, so I’ll get to the swatches now.
 Pot of Gold (Evil Queen) – Liquid gold metallic. This polish reminds me SO much of JulieG’s Liquid Metal. Completely gorgeous, and one of my favorites in the collection. Two coats were used for this photo.
 Cranberry (Evil Queen) – Deep metallic red with gold micro shimmer. This too reminds me of one of my JulieG polishes, Dolled Up Dorothy. It’s like the Christmas season in a bottle, and another one of my faves. Two coats were used for this photo.
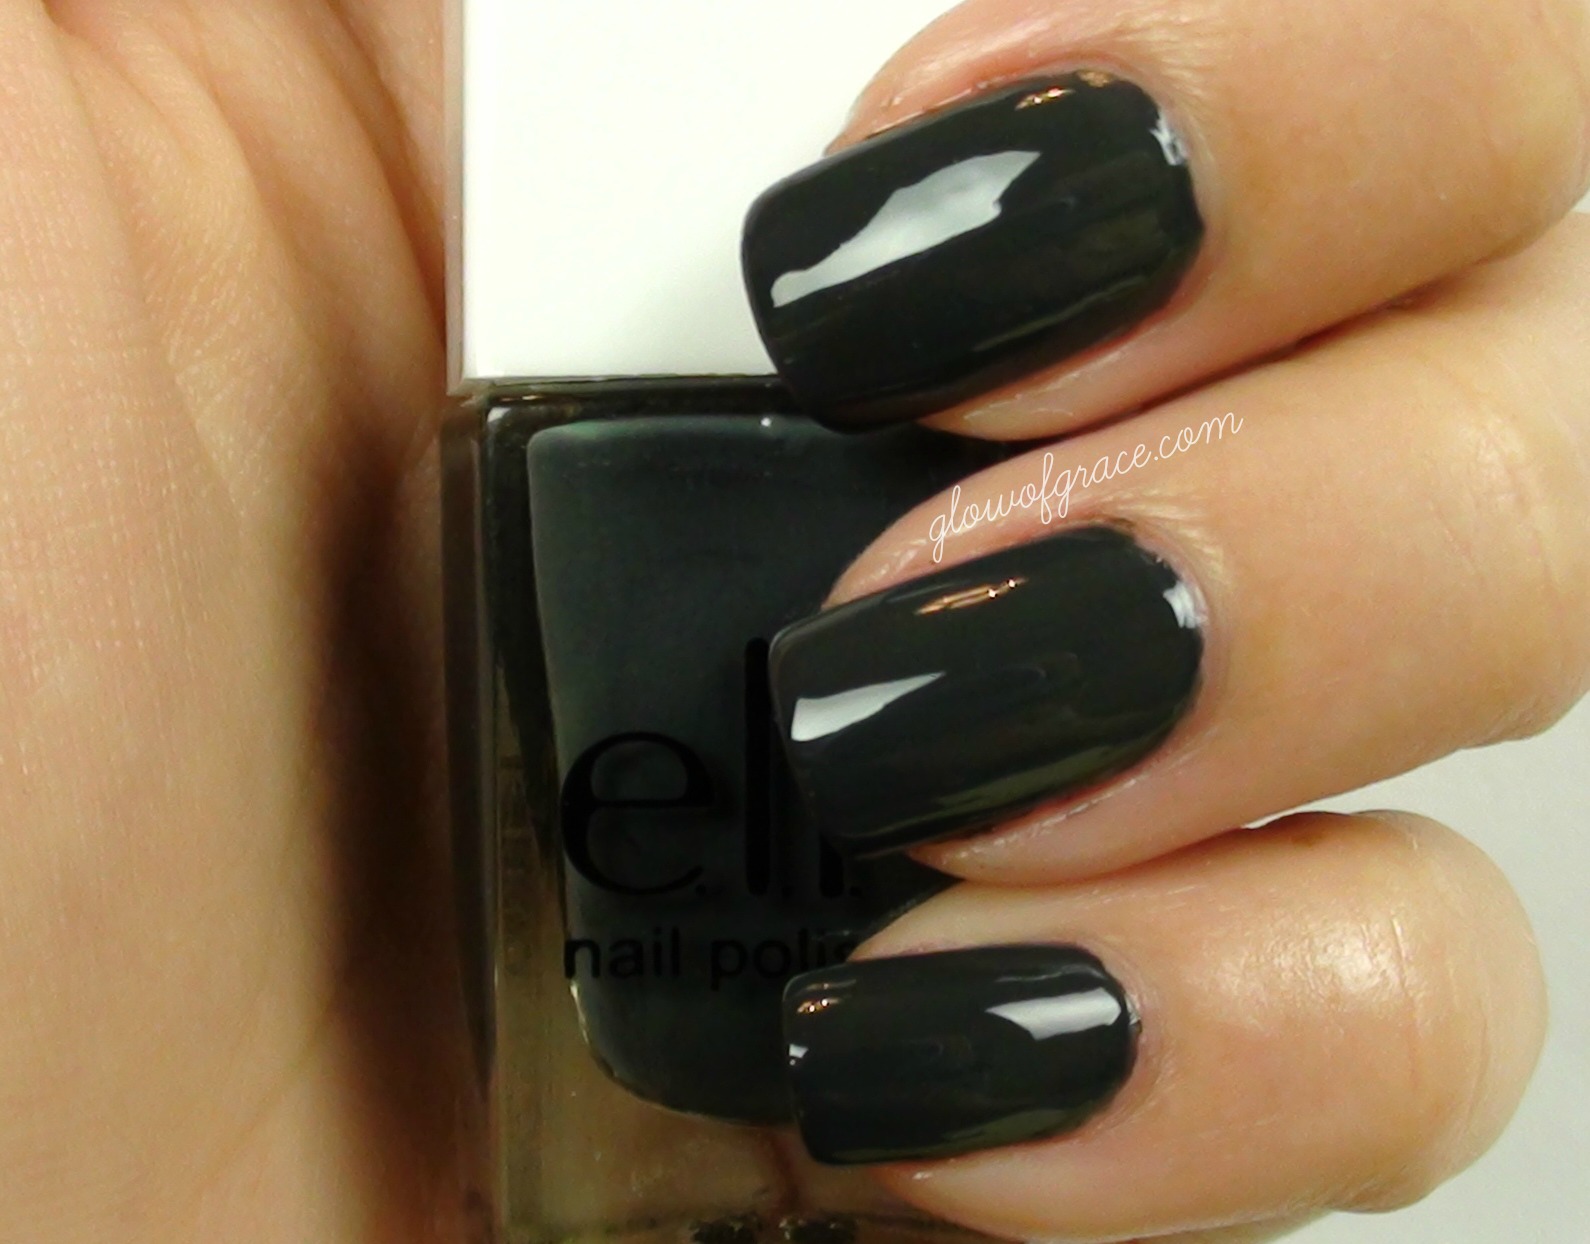 Thunderstorm (Evil Queen) – Deep, blue-green gray creme. The name is very fitting because the polish looks dark gray in the bottle, but has a blue-green tint to it on the nails that’s only visible in certain light. Just like those ominous clouds that appear right before the heavens unleash their fury. Two coats were used for this photo.
 Nude (Cruella de Vil) – Pink nude creme. This is, in my opinion, a perfect nude polish. Brown nudes don’t look good on everyone, but I think this shade would flatter any skin tone. Two coats were used for this photo.
 Smokin Hot (Cruella de Vil) – Neon red crelly (For those of you don’t know what “crelly” means, don’t feel bad. I had to look it up too. It’s a cross between a thin, jelly polish and a more opaque, creme polish). Such a vibrant, neutral red that looks just liked a candied apple. Three coats were used for this photo.
 Smoky Brown (Cruella de Vil) – Dark chocolate creme. I never thought I’d want to wear a brown polish, but I kind of love this. It looks like you dipped your fingers in dark chocolate. Yum! Two coats were used for this photo.
 Coral Dream (Ursula) – Neon coral crelly. This is a very orange-y coral, but would be a fun polish in the spring and summer, or a good alternative to pumpkin orange in the fall. Three coats were used for this photo.
 Mint Cream (Ursula) – This will sound cliche, but it’s a mint creme. You know I love my mint polishes, and this is one is my new favorite. Two coats were used for this photo.
 Sea Escape (Ursula) – A deep navy creme with teal micro shimmer. I am SO disappointed that this didn’t photograph better. This is BEAUTIFUL in person and it’s a fun alternative to wearing black polish. The navy is so dark, and the light catches the shimmer just right to make it interesting. Two coats were used for this photo.
 Bubble Gum Pink (Maleficent) – Medium, blue-toned pink creme. I normally wouldn’t reach for this shade of pink, but I kind of like it! However, this was not as opaque as the other creme polishes in the collection. Three coats were used for this photo.
 Mod Mauve (Maleficent) – Dark, plum-y mauve. WOW. This was by far a favorite. This color is just gorgeous, and I have nothing like it in my collection. Two coats were used for this photo.
 Gina Girl (Maleficent) – A sheer grape crelly with purple and gold glitter. This was really the only one that was a miss for me. It was too sheer to wear on it’s own, and there wasn’t enough glitter in just one coat. I layered two coats over Mod Mauve, but just looks a little muddy to me. This might be prettier layered over Nude.
Now, I was just going to leave this post at that, but before I go I wanted to mention the Maleficent Nail Art Kit by Kiss that I featured in today’s tutorial. You can see the full, step-by-step how to for this fun nail art by clicking HERE or on the photo below.
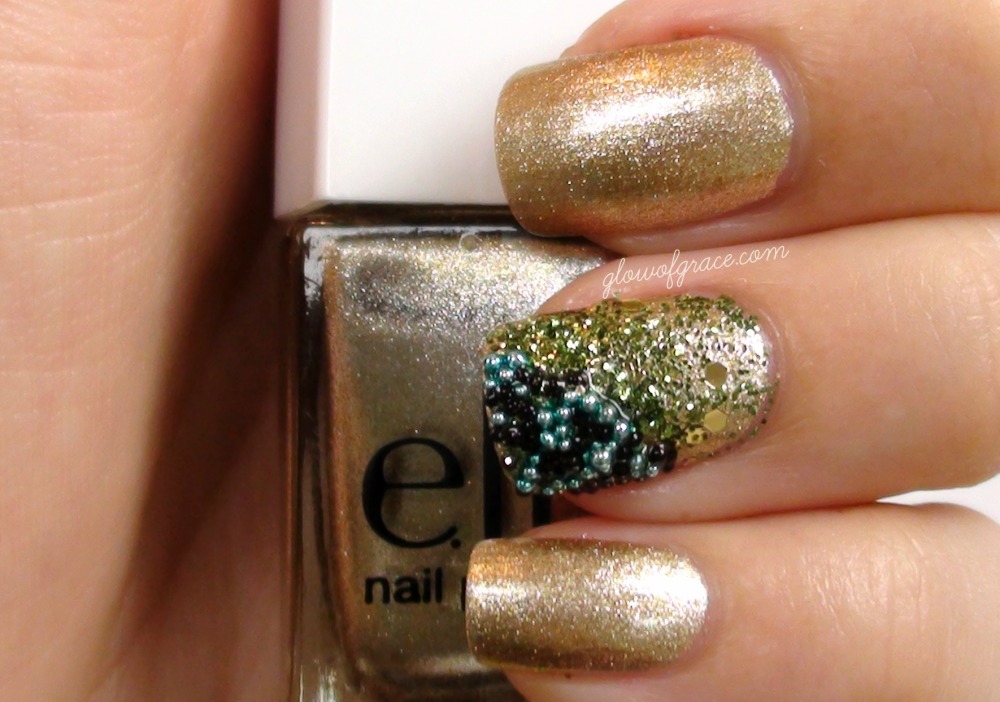
I had no intention of reviewing the nail kit, but after using it, I simply have to. I know this post has already been a novel though, so I’ll try to be brief. There are lots of fun nail art tools in this kit–nail caviar, many types and colors of glitter, rhinestones, decals. However, the glitter and the way it was packaged was disastrous. It was all in little baggies that were not closed, but merely folded in half and adhered to a piece of cardboard with overly sticky double sided tape. When I tried to remove one of the bags, I had to pull so hard that I was already getting glitter everywhere before I’d even started the tutorial. All of the pulling warped the bags, which then made pouring the glitter on to your nail difficult, and pouring the excess glitter back in the bags nearly impossible. So while I really enjoy everything that was offered in the kit, the packaging leaves something to be desired. And the color scheme of the nail kit was kind of all over the place. It didn’t seem to fit with the green, earthy tones of the e.l.f. Maleficent lookbook, but it didn’t go with the orchid shades of the e.l.f. Maleficent nail polish collection either. Although as I’m typing that, I realize that may be more of an issue with the e.l.f Maleficent products not having one coherent color scheme.
If you made it to the end, congrats and thanks for sticking with me! I hope y’all enjoyed this review, and don’t forget to check out the tutorial. Leave a comment telling me which of these polishes is your favorite!
Best & Blessings,
Rachel
**Disclaimer: These products were sent to me for my consideration & review, but as always, all opinions are 100% honest and my own.**

You did an incredible job swatching these! Love! xoxo
LikeLike
Very thorough review. Thanks!!!
LikeLike
You’re welcome!! 🙂
LikeLike
how do you take it off when you want to change colour it so hard to get off thank you
LikeLike
I use acetone, but if you don’t want to use that, I’d at least use a remover with acetone.
LikeLike
Gorgeous nails & colors! What kind of topcoat do you use??
LikeLike
Thanks!! My favorite is the Nailtiques Formula 2, but recently I’ve been trying the Sally Hansen Double Duty.
LikeLike
These colors are so pretty! I am tempted to get the collection. Your nails are gorgeous!
LikeLike
Thanks lady! You totally should!! They’re AMAZING colors. I just love them!
LikeLike
Thanks for the swatches. I did mine on a color wheel and they came out considerably lighter ( especially thunderstorm) so it’s nice to see what they all look like on a person.
LikeLike
No problem!! I am in LOVE with this collection!!!!
LikeLike