Happy Monday, my friends!! Last week I uploaded a haul of the Disney Villains Collection that just came out for Walgreens. Disney partnered with e.l.f. cosmetics, Ardell, and Kiss to bring you a whole line of cosmetics that are inspired by your favorite villains–Maleficent, Ursula, Cruella de Ville and the Evil Queen. I am personally a Disney freak because I’m basically a five year old at heart, and I’m lucky enough to have an in with the Disney PR team! One of my beloved beauty blogger beauties Marisa from Apartment 402 works for them and asked if I would be interested in reviewing some of these new items, so thanks for this opportunity Maris! Check out my haul to see what else I got!

My panda sister Dani from CoffeeBreakWithDani also received the collection for review, so we thought it would be fun to collaborate and do the nighttime looks from our respective e.l.f. lookbooks! My items came from the Maleficent collection and Dani got the Ursula collection, so the looks are quite different, which makes for the perfect collab. Don’t you think?

The lookbooks come with pretty much everything you would need to create a maleficently, villainous look. You see what I did there? 😉 Instructions for both a daytime and nighttime look, a mascara, a pencil eyeliner, a liquid eyeliner, an eyeshadow palette, an eye primer, a lip color, and an e.l.f. shading brush. The best part? The lookbook can be yours for just $9.99. That’s right ALL of that is just under ten dollars. I’ve used only a few e.l.f. products before and I’ve been pretty happy, but I’m not going to lie my expectations weren’t super high for any of the products in this lookbook. When I filmed the tutorial, I was using everything for the first time, so I thought it would be fun to share my thoughts and first impressions in a corresponding blog post.

Eye primer: I have heard good things about this primer, so I was excited to try it out for myself. I must say I was impressed!! It reminded me a lot of the Urban Decay Eye Primer Potion. It’s best to let it set or dry before applying shadow, but it kept my shadow in place all day!
Eyeshadow palette: I only used four of the six shadows for this look, but I was pleasantly surprised by the pigmentation. Because of my Urban Decay addiction, my standards for shadow are extraordinarily high, but these held their own. They’re a little bit powdery, and not quite as pigmented as my UD shadows, but as you can see from the tutorial, they definitely have some good pigmentation. I do say “build up the color,” and just for your reference, I repeated the process shown in the clips twice to achieve the pigmentation that I had.
Shading brush: I’ve also got pretty high standards when it comes to brushes, and from looking at the brush, I wasn’t expecting much. The bristles were a little wonky–slightly uneven and not quite a uniform shape. However, it picked up the shadows and applied them well. It wasn’t as soft as my go-to Sigma e55 shading brush, but I will definitely be working this in to the regular rotation.
Pencil Eye Liner: Ugh. My mom and I have a name for products like this one. We call it fake makeup, you know, like the plastic lipsticks and eyeshadows that you give to your 3 year old daughter so that she can pretend to put on makeup with you. It was hard, not at all creamy, and just hardly pigmented. It didn’t function well in the waterline at all, but I don’t think it would be any better along the lash line either. On the plus side, it didn’t smudge everywhere, but I guess there wasn’t anything to smudge in the first place…
Liquid Liner: I’m starting to see a trend. I’m picky with my liquid liners as well. I prefer to use pens like the Physicians Formula Liner & Lash Serum Duo or the Eyeko Skinny Liquid Eyeliner because I find the pens easier to manipulate, and both of those are drier formulas. Again I was pleasantly surprised though. Although it’s a little too liquidy for my taste (I had one mishap with transfer to my lid), it applied smoothly and dried quickly. The brush was a perfect combination of stiff and flexible, thick and thin. And it didn’t drip into my eyeballs as I applied it, which is always nice. I will definitely use this again.
Volumizing & Lash Defining Mascara: If you’ve been following me for a while, you’ll know that I have very little patience for any mascara that isn’t waterproof because it just won’t hold my curl. This was no different. I suppose it was okay in the lash defining and volumizing department, but nothing too special there either. I might use this on the days that I’m applying falsies though because it worked well enough to darken my lashes. It didn’t flake or smudge though!
Lip Color: This was some hybrid between a liquid lipstick and a lip gloss. It was super smooth and creamy with no weird smell or taste, and had good buildable pigmentation. It glided on like a gloss and wasn’t drying like a liquid lipstick, but it felt thicker than a gloss and was definitely more opaque than your average gloss. Unfortunately, I didn’t put the wearability to test for very long. I filmed this tutorial at like 6am before a long day of meetings and band rehearsal at church. I figured the dark smoky eye with some crazy falsies was plenty to bombard my church family with at 9am without adding a red lip to that mix too. However, I would guess that it would probably wear much like a lip gloss.
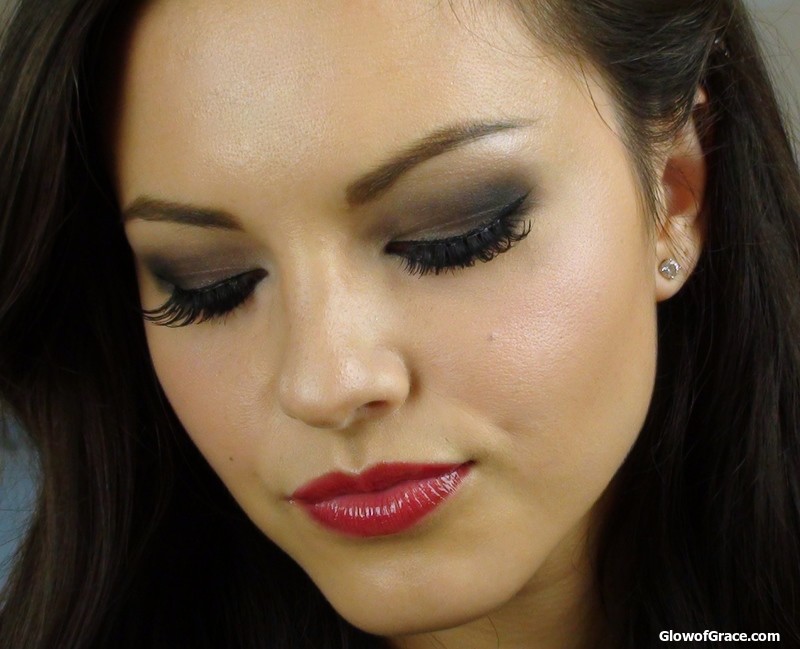
This was the final look! To see the full tutorial and list of other products both used and worn, please click HERE.

Now I’m ready to take down Sleeping Beauty and her precious Prince! Muahahahahaha!
Don’t forget to check out Dani’s tutorial and review of the Ursula lookbook!! I just LOVE this look on her, so I can’t wait to see how she did it! And while you’re there, subscribe to her channel if you aren’t already. She posts EVERY SINGLE WEEK DAY! So subscribe to have a coffee break with her each morning.
Best & Blessings,
Rachel
**Disclaimer: This lookbook was sent me by Disney for my review and consideration. I am not being paid for this review or tutorial, and as always, all opinions are 100% honest and my own.
